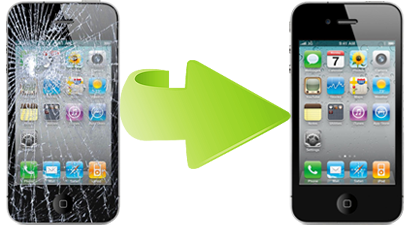
So did your iPhone run out of your hands and dropped on the floor and when you picked it up you were disturbed to see the broken screen of your iPhone. I know how it feels when you see the broken screen of your iPhone, this is a matter of serious concern for you but don’t worry there’s no need to panic, sit down and just relax (well try to breathe at least) we have a solution for replacing your cracked iPhone screen. Yay!!

Before we start you need to have a toolkit for opening a number of screws (3.66 mm, 1.2 mm, 1.6 mm, 1.9 mm) of your iPhone and a new screen to replace with the broken one.
Step 1 – Connect the iPhone to iTunes to make a backup of your data. Once you are finished backing up your data, switch off your iPhone. Now remove the two 3.6 mm Penta lobe screws on both sides of your iPhone’s charging connector. Now push the rear panel upwards using your thumbs and then pull rear panel away from the iPhone.
Step 2 – Now remove the battery of your iPhone (See our tutorial How to remove battery of your iPhone, coming soon). After removing the battery remove the SIM card and its holder tray.
Step 3 – Remove the two screws you see on the left side of your battery holder. Then carefully remove the dock ribbon cable off the logic board. Now remove the lower antenna connector from its socket on the logic board.
Step 4 – Now open the screw on the bottom of the logic board, and then remove the five screws securing the Wi-Fi antenna. Later remove the Wi-Fi antenna from the iPhone.
Step 5 – Carefully lift the rear camera connector up off its socket on the logic board and remove the rear camera. Gently remove the connectors up of LCD cable Headphone jack, Digitizer cable, Front camera cable, Top Microphone/sleep button cable.
Step 6 – Carefully remove the logic board from the iPhone and then remove the screw securing the speaker enclosure.
Step 7 – Remove the two screws on the vibrator and then remove the vibrator from your iPhone. Then remove the three screws along the volume button side of your iPhone. After this remove the screw near the microphone.
Step 8 – Open and remove the screw near the dock connector ribbon cable. Then remove the three screws along the SIM card side and the screw near the rear camera of your iPhone.
Step 9 – Carefully open and remove front panel assembly away from the inner steel frame. Make sure that you don’t pull the front panel too hard, slowly peel it off from the adhesive below the home button area.
Step 10 – Unplug all the digitizer and LCD cables from the inner steel frame of your iPhone.
Step 11 – Now very carefully pull in the new screen and make sure you attach all the plug- in on it. After this pack the whole iPhone in the reverse pattern in which you opened it. After reassembly, protect your new display from any scratches by installing a new screen protector.
Don’t forget to connect your iPhone to iTunes to restore your data.
Hope you will be able to get your iPhone in the same condition as earlier. Now be careful handling your phone or you will again end up spending money for buying new screens.
Thanks & Cheers.

